
instructions for bissell quicksteamer
The Bissell QuickSteamer is a lightweight‚ multi-surface deep cleaner designed for efficient and easy cleaning of carpets‚ upholstery‚ and hard floors‚ offering versatility and convenience.
Overview of the Bissell QuickSteamer
The Bissell QuickSteamer is a lightweight‚ multi-surface deep cleaner designed to make home cleaning efficient and straightforward. It features a compact design and advanced functionality‚ allowing users to tackle various surfaces‚ including carpets‚ upholstery‚ and hard floors‚ with ease. The device is equipped with six rows of brushes to deeply embedded dirt and stains‚ ensuring a thorough cleaning experience. Its self-storing cord and easy-to-use controls enhance portability and convenience. The QuickSteamer is backed by a limited one-year warranty‚ reflecting Bissell’s commitment to quality and customer satisfaction. With clear instructions and maintenance guidelines‚ this cleaner is a practical choice for maintaining a clean and hygienic home environment.
Importance of Following the User Guide
Following the user guide for the Bissell QuickSteamer is essential to ensure optimal performance‚ safety‚ and longevity of the machine. The guide provides detailed instructions for assembly‚ operation‚ and maintenance‚ helping users achieve the best cleaning results. It outlines safety precautions to prevent accidents and damage to the device. Proper assembly and usage techniques are crucial to avoid mechanical issues and ensure the machine functions effectively. Additionally‚ the guide includes troubleshooting tips for common problems‚ such as low suction or spraying issues‚ which can save time and effort. Adhering to the guidelines also helps maintain the warranty‚ as improper use may void it. By reading and following the user guide‚ users can maximize their cleaning experience and keep their QuickSteamer in excellent condition for years to come.

Safety Precautions
Always follow safety guidelines to ensure safe operation of the Bissell QuickSteamer. Keep it out of reach of children and avoid using it near hot surfaces or flammable materials.
General Safety Warnings
Always prioritize safety when using the Bissell QuickSteamer. Ensure the area is clear of clutter and avoid using the cleaner near water or flammable materials. Keep children and pets away during operation. Never leave the device unattended or touch hot surfaces. Avoid overloading the machine‚ as this could cause malfunction. Always unplug the device before cleaning or maintaining it. Use only approved cleaning solutions to prevent damage. Follow all instructions carefully to avoid injury or damage. Proper usage ensures safe and effective cleaning.

Electrical Safety Instructions
Ensure the Bissell QuickSteamer is properly grounded to avoid electrical hazards. Use the cleaner on a grounded electrical outlet only. Avoid using the device near water or in damp environments. Never submerge electrical parts in water or expose them to moisture. Keep the power cord away from heated surfaces and avoid overloading circuits. Do not use the cleaner with a damaged cord or plug. Unplug the machine when not in use or during maintenance. Store the device in a dry‚ cool place‚ away from direct sunlight. Always follow the manufacturer’s electrical guidelines to prevent accidents or malfunctions.

Assembly Instructions
Unpack and identify all components. Attach the handle assembly securely. Install the water tank according to the manufacturer’s guidelines. Ensure all parts are properly aligned and tightened.
Unpacking and Identifying Components
Begin by carefully unpacking the Bissell QuickSteamer from its box. Inside‚ you’ll find the main unit‚ handle assembly‚ water tank‚ brush roll‚ and power cord. Inspect each part for damage. The handle assembly includes the upper and lower sections‚ which connect to the main unit. The water tank is detachable and holds hot tap water for cleaning. The brush roll is equipped with six rows of brushes for deep carpet cleaning. Familiarize yourself with these components‚ as they are essential for proper assembly and operation. Always refer to the user manual for detailed descriptions and diagrams. Ensure all parts are accounted for before proceeding to assembly. This step ensures a smooth and successful setup of your Bissell QuickSteamer.
Attaching the Handle Assembly
To attach the handle assembly‚ align the lower handle with the main unit’s handle receptor. Gently push down until it clicks securely into place. Next‚ attach the upper handle by inserting the handle posts into the pre-drilled holes on the lower handle. Tighten the screws firmly using the provided screwdriver. Ensure the handle is upright and tightly secured for stability. Adjust the handle height to your preference by loosening the adjustment knob‚ setting it to the desired height‚ and tightening the knob again. Double-check all connections for stability before use. Properly assembling the handle ensures optimal performance and ease of maneuverability while cleaning. Always refer to the user manual for diagrams or additional guidance if needed.
Installing the Water Tank
To install the water tank‚ first ensure the machine is turned off and unplugged. Locate the water tank compartment‚ usually positioned at the rear or side of the cleaner. Align the water tank with the compartment‚ ensuring the connectors match up. Gently push the tank into place until it clicks securely. Tighten any retaining clips or screws if provided. Fill the tank with clean‚ hot tap water to the maximum level indicated on the tank to avoid overfilling. Avoid adding cleaning solutions directly to the water tank unless specified in the manual. Once installed‚ plug in the machine and test the water flow by pressing the spray trigger. Proper installation ensures efficient cleaning and prevents leaks. Always refer to the user manual for specific tank installation diagrams or guidance.

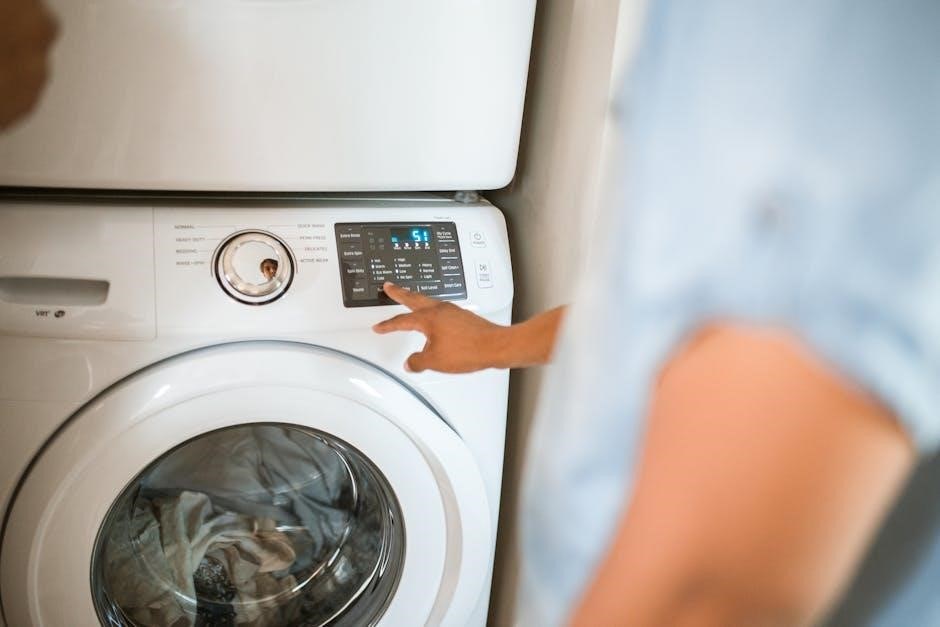
Operating the Bissell QuickSteamer
Fill the water tank with hot tap water‚ plug in the machine‚ and press the steam trigger to release cleaning solution. Glide smoothly over surfaces for effective cleaning.
Preparing the Machine for Use
Before using the Bissell QuickSteamer‚ ensure all components are properly assembled. Fill the water tank with clean hot tap water‚ avoiding any additives. Plug in the machine and allow it to heat up for a few minutes. Check that the brush roll is securely in place and that there are no obstructions. For optimal results‚ pre-treat heavily soiled areas with a cleaning solution before steaming. Always test a small‚ inconspicuous area first to ensure the surface can withstand steam cleaning. Once prepared‚ the machine is ready to effectively clean various surfaces‚ providing a deep and thorough cleanse;
Using the Steamer on Different Surfaces
The Bissell QuickSteamer is designed to clean various surfaces effectively. For carpets and upholstery‚ use the steam cleaner with the provided brushes to gently lift dirt and stains. On hard floors‚ switch to the hard-floor cleaning tool‚ ensuring the surface is free of debris. Adjust the steam control based on the surface type‚ using lower settings for delicate materials and higher settings for heavily soiled areas. Always test a small area first to ensure the surface can withstand steam cleaning.
- For carpets‚ pre-treat stains and use slow‚ overlapping passes to ensure thorough cleaning.
- On upholstery‚ use a clean cloth to wipe away steam and dirt‚ avoiding excessive moisture.
- For hard floors‚ clean in sections‚ rinsing the cleaning pad frequently to prevent dirt transfer.
Regularly emptying and refilling the water tank ensures consistent steam output and optimal cleaning performance.
Emptying and Cleaning the Water Tank
To maintain the performance of your Bissell QuickSteamer‚ regular cleaning of the water tank is essential. After each use‚ unplug the machine and empty the tank completely. Rinse it with warm water to remove any remaining cleaning solution or debris. For deeper cleaning‚ mix mild detergent with warm water and let it soak inside the tank for about 10 minutes. Use a soft brush to scrub away any stubborn dirt or mineral deposits. Rinse thoroughly and dry the tank with a clean cloth to prevent bacterial growth. Avoid using harsh chemicals or abrasive cleaners‚ as they may damage the tank material. Always ensure the tank is dry before storing the machine to maintain hygiene and prevent odors.
- Empty the tank after each use to prevent residue buildup.
- Use mild detergent for periodic deep cleaning.
- Avoid harsh chemicals to protect the tank material.
- Dry the tank thoroughly before storage.
Maintenance and Care
Regular maintenance ensures optimal performance and longevity of your Bissell QuickSteamer. Clean the water tank‚ brush roll‚ and filters after use‚ and ensure all parts are dry before storage.
- Clean the water tank and filters regularly.
- Check for blockages in the spray nozzle.
- Ensure the machine is dry after use.
Cleaning the Brush Roll and Belt
To maintain your Bissell QuickSteamer’s performance‚ regularly clean the brush roll and belt. Turn off and unplug the machine before starting to ensure safety.

Locate the brush roll access door and remove it to access the brush roll and belt. Use scissors or a similar tool to carefully remove any hair‚ debris‚ or string wrapped around the brush roll.
Inspect the belt for signs of wear‚ cracks‚ or damage. If damaged‚ replace it immediately to avoid further issues with the machine’s operation.
Reassemble the parts securely after cleaning and ensure all components are properly aligned for optimal performance.
Regular cleaning of the brush roll and belt helps prevent clogs and ensures effective cleaning results. This maintenance step is crucial for prolonging the lifespan of your QuickSteamer.
Replacing the Brush Belt
To replace the brush belt on your Bissell QuickSteamer‚ start by unplugging the machine and turning it off for safety. Locate the brush roll access door and remove it to access the belt.
Next‚ remove the old belt by sliding it off the pulleys. Inspect the area for any debris and clean it to ensure smooth operation. Take the new belt and loop it around the motor pulley and the brush roll pulley‚ ensuring it is properly seated and aligned.
Replace the access door and test the machine by turning it on to check if the brush roll spins correctly. If the belt is misaligned or loose‚ adjust it as needed. Regular belt replacement helps maintain optimal performance and prevents damage to the machine.
This process is crucial for keeping your QuickSteamer efficient and extending its lifespan. Always refer to the user manual for specific instructions if you encounter any issues during the replacement.
Cleaning the Filters
Cleaning the filters of your Bissell QuickSteamer is essential for maintaining optimal performance and ensuring efficient suction and steam distribution. To clean the filters‚ start by turning off and unplugging the machine for safety.
Locate the filters‚ which are typically found in the water tank or near the motor. Remove them gently and rinse with warm water to eliminate dirt and debris. For stubborn particles‚ soak the filters in a mixture of warm water and mild detergent for about 10 minutes before rinsing thoroughly.
Drying the Machine After Use
Properly drying your Bissell QuickSteamer after each use is crucial to prevent mold growth and maintain its performance. Start by unplugging the machine and emptying the water tank completely to avoid any residual moisture.
Next‚ remove any detachable parts‚ such as the water tank and filters‚ and dry them thoroughly with a clean towel. Allow the machine to air dry in a well-ventilated area‚ ensuring all components are free from moisture before storage.
Regular drying helps prevent bacterial growth and ensures the machine remains in optimal working condition. Always refer to the user manual for specific drying instructions tailored to your model.

Troubleshooting Common Issues

The Bissell QuickSteamer may face issues like no suction or low spray. This section helps identify and resolve common problems easily‚ ensuring optimal performance with simple solutions.
No Suction or Low Suction
If your Bissell QuickSteamer has no suction or low suction‚ check for blockages in the hose or cleaner head. Ensure the dust bag or dirt container is empty. If using a bag‚ replace it if full. Check belts for damage or misalignment and repair or replace as needed. Also‚ verify that all connections are secure. For models with filters‚ clean or replace them according to the manual. If the issue persists‚ inspect the vacuum for internal blockages or damage. Regular maintenance‚ such as cleaning filters and checking for worn parts‚ can prevent suction problems. Refer to the troubleshooting section for detailed steps to restore proper suction and performance.
No Spray or Low Spray
If your Bissell QuickSteamer is experiencing no spray or low spray‚ start by checking the water tank. Ensure it is properly filled with clean hot tap water and securely attached to the machine. Next‚ inspect the spray tip for clogs or debris‚ cleaning it with a small brush or replacing it if damaged. Check the pump for priming issues—press the spray trigger several times to activate the flow. If the problem persists‚ examine the hose and connections for kinks or blockages. Ensure all parts are securely attached. For severe issues‚ refer to the manual for guidance on cleaning or replacing the spray nozzle. Regular maintenance‚ such as cleaning the filters and checking for worn-out parts‚ can help prevent spray-related problems. Always follow the manufacturer’s instructions for optimal performance.
Leaking Issues
If your Bissell QuickSteamer is leaking‚ start by inspecting the water tank and its connections. Ensure the tank is securely attached to the machine‚ as loose connections can cause leaks. Check the tank for cracks or damage and replace it if necessary. Overfilling the tank can also lead to leakage‚ so make sure not to exceed the recommended water level. Additionally‚ inspect the pump and internal tubes for blockages or kinks‚ which may prevent proper water flow and cause leaks. If the issue persists‚ check the spray nozzle and connections for wear or damage. Tightening any loose parts or replacing damaged components can resolve the problem. Regularly cleaning and maintaining the machine can help prevent leaks and ensure optimal performance. Always refer to the user manual for specific guidance on handling leaks effectively.
Brush Not Turning
If the brush on your Bissell QuickSteamer is not turning‚ start by checking the brush belt for damage or wear. A broken or loose belt can prevent the brush from rotating. Inspect the belt and replace it if necessary. Additionally‚ ensure the brush roll is free from blockages‚ such as tangled hair or debris‚ which may restrict its movement. If the issue persists‚ check if the brush is properly installed and aligned. Ensure all connections and components are secure. If the brush is damaged or worn out‚ replace it with a genuine Bissell part. Regular maintenance‚ such as cleaning the brush roll and ensuring proper assembly‚ can help prevent this issue. Always unplug the machine before performing any repairs or inspections for safety.

Additional Resources
Access the user manual online for detailed instructions and troubleshooting. Visit BISSELL’s official website for customer support‚ or refer to the provided warranty information for coverage details.
Downloading the User Manual
To download the Bissell QuickSteamer user manual‚ visit the official BISSELL website or authorized support pages. Navigate to the “Support” section and enter your product model number (e.g.‚ 1770‚ 2080) in the search bar. Select the appropriate manual from the results and click the “Download” option. The manual is available in PDF format‚ ensuring easy access on any device. It includes detailed assembly instructions‚ operating guidelines‚ safety precautions‚ and troubleshooting tips. Additionally‚ the manual provides maintenance schedules and warranty information. By downloading the manual‚ you can ensure proper usage and extend the lifespan of your QuickSteamer. Refer to it for step-by-step guidance on resolving common issues‚ such as low suction or spray problems‚ and for optimizing cleaning performance. This user-friendly guide is essential for maximizing your cleaning experience.
Accessing Customer Support
For assistance with your Bissell QuickSteamer‚ visit the official BISSELL website and navigate to the “Support” section. Here‚ you can find troubleshooting guides‚ FAQs‚ and direct contact options. To reach customer support‚ click on “Contact Us” and fill out the form with your query and model details. You can also call the BISSELL customer service hotline for immediate help. Additionally‚ the website offers a “Live Chat” feature for quick answers. Ensure to have your product’s model number ready‚ such as 1770 or 2080‚ to expedite assistance. The support team is available to address issues like malfunctioning parts or operational concerns. BISSELL also provides resources for warranty claims and replacement parts‚ ensuring comprehensive support for your QuickSteamer. Utilize these services to resolve any queries and maintain optimal performance of your cleaner.
Warranty Information
Your Bissell QuickSteamer is backed by a limited one-year warranty‚ covering defects in materials and workmanship. To ensure coverage‚ register your product on the BISSELL website or retain the original purchase receipt. The warranty guarantees repairs or replacements at BISSELL’s discretion for eligible issues. For full warranty details‚ visit the BISSELL website and review the warranty section. Note that the warranty excludes damage caused by misuse‚ normal wear‚ or failure to maintain the product properly. For warranty claims‚ contact BISSELL customer support with your product’s model number‚ such as 1770 or 2080‚ and proof of purchase. Download the warranty guide from the BISSELL site for comprehensive information on coverage and terms.